PROMULTIFIX SYSTEM
Un prodotto, tante soluzioni
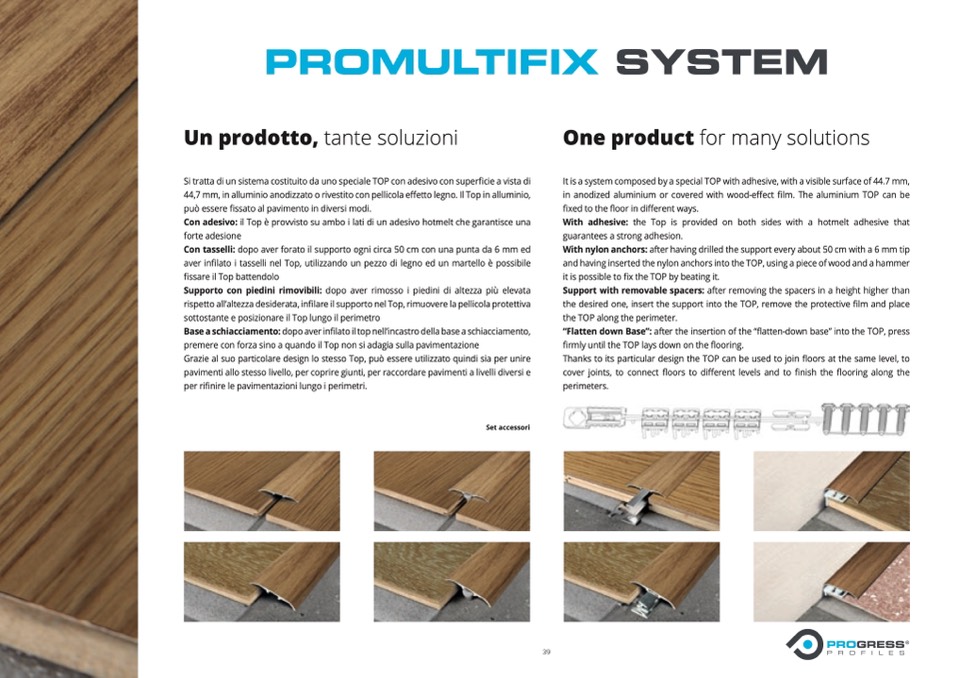
Si tratta di un sistema costituito da uno speciale TOP con adesivo con superficie a vista di
44,7 mm, in alluminio anodizzato o rivestito con pellicola effetto legno. Il Top in alluminio,
può essere fissato al pavimento in diversi modi.
Con adesivo: il Top è provvisto su ambo i lati di un adesivo hotmelt che garantisce una
forte adesione
Con tasselli: dopo aver forato il supporto ogni circa 50 cm con una punta da 6 mm ed
aver infilato i tasselli nel Top, utilizzando un pezzo di legno ed un martello è possibile
fissare il Top battendolo
Supporto con piedini rimovibili: dopo aver rimosso i piedini di altezza più elevata
rispetto all’altezza desiderata, infilare il supporto nel Top, rimuovere la pellicola protettiva
sottostante e posizionare il Top lungo il perimetro
Base a schiacciamento: dopo aver infilato il top nell’incastro della base a schiacciamento,
premere con forza sino a quando il Top non si adagia sulla pavimentazione
Grazie al suo particolare design lo stesso Top, può essere utilizzato quindi sia per unire
pavimenti allo stesso livello, per coprire giunti, per raccordare pavimenti a livelli diversi e
per rifinire le pavimentazioni lungo i perimetri.
Set accessori
One product for many solutions
It is a system composed by a special TOP with adhesive, with a visible surface of 44.7 mm,
in anodized aluminium or covered with wood-effect film. The aluminium TOP can be
fixed to the floor in different ways.
With adhesive: the Top is provided on both sides with a hotmelt adhesive that
guarantees a strong adhesion.
With nylon anchors: after having drilled the support every about 50 cm with a 6 mm tip
and having inserted the nylon anchors into the TOP, using a piece of wood and a hammer
it is possible to fix the TOP by beating it.
Support with removable spacers: after removing the spacers in a height higher than
the desired one, insert the support into the TOP, remove the protective film and place
the TOP along the perimeter.
“Flatten down Base”: after the insertion of the “flatten-down base” into the TOP, press
firmly until the TOP lays down on the flooring.
Thanks to its particular design the TOP can be used to join floors at the same level, to
cover joints, to connect floors to different levels and to finish the flooring along the
perimeters.
39

