>B< OYSTER ASSEMBLY INSTRUCTIONS:
Tools required:
Cutting tool, deburring tool and flat-faced spanner.
Assembly
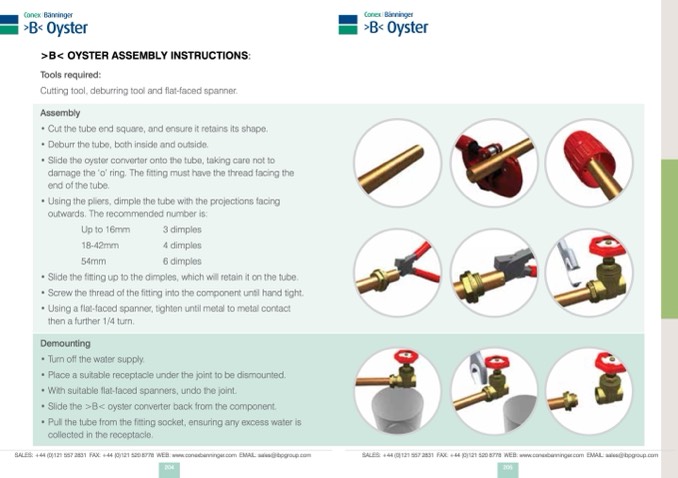
• Cut the tube end square, and ensure it retains its shape.
• Deburr the tube, both inside and outside.
• Slide the oyster converter onto the tube, taking care not to
damage the ‘o’ ring. The fitting must have the thread facing the
end of the tube.
• Using the pliers, dimple the tube with the projections facing
outwards. The recommended number is:
Up to 16mm
18-42mm
54mm
3 dimples
4 dimples
6 dimples
• Slide the fitting up to the dimples, which will retain it on the tube.
• Screw the thread of the fitting into the component until hand tight.
• Using a flat-faced spanner, tighten until metal to metal contact
then a further 1/4 turn.
Demounting
• Turn off the water supply.
• Place a suitable receptacle under the joint to be dismounted.
• With suitable flat-faced spanners, undo the joint.
• Slide the >B< oyster converter back from the component.
• Pull the tube from the fitting socket, ensuring any excess water is
collected in the receptacle.
SALES: +44 (0)121 557 2831 FAX: +44 (0)121 520 8778 WEB: www.conexbanninger.com EMAIL: sales@ibpgroup.com
SALES: +44 (0)121 557 2831 FAX: +44 (0)121 520 8778 WEB: www.conexbanninger.com EMAIL: sales@ibpgroup.com
204
205

